Autumn Stained Glass Blooms + Coloring With Copics
I’ve always loved the look of stained glass. Mosaics, too. I find the bright, translucent colors and thick dark lines make such a beautiful contrast – delicate and bold at the same time. For today’s card, I added some autumn color to this lovely stained glass design with Copic Sketch markers.
Stamping and Coloring
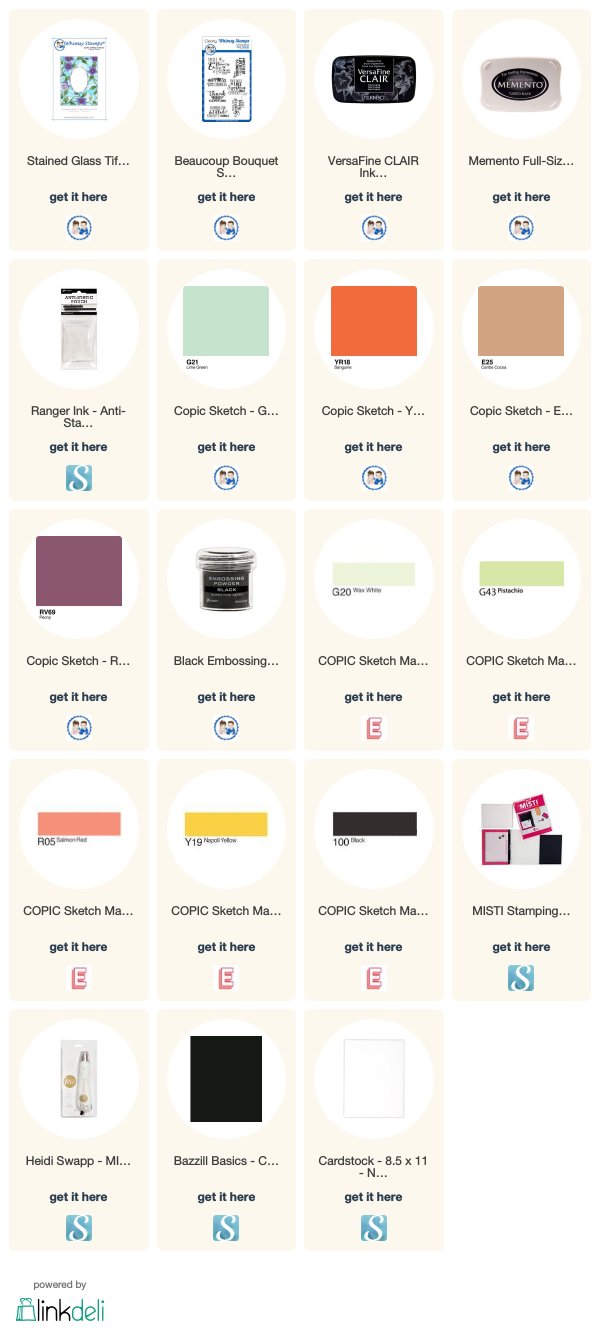
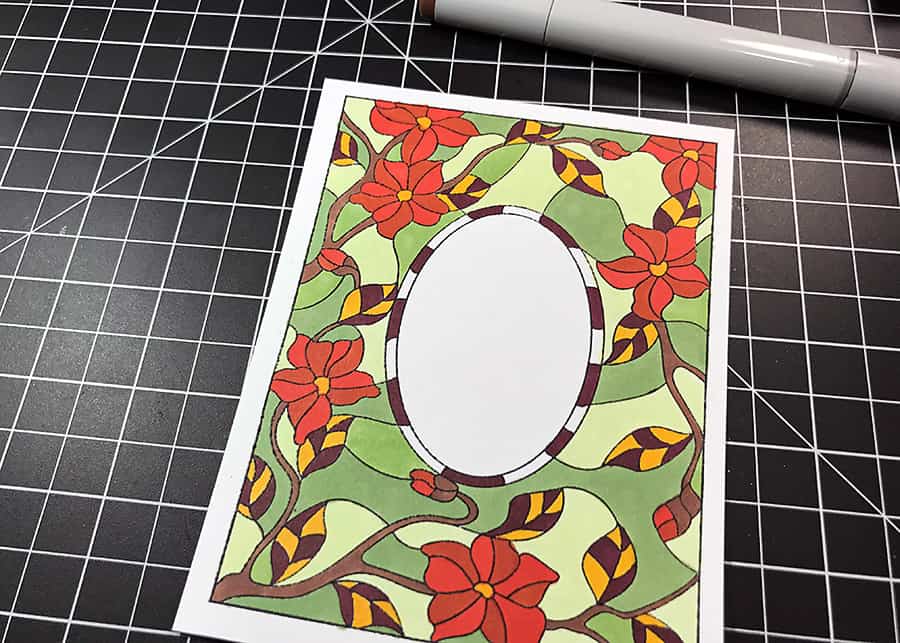
To start, I stamped the Stained Glass Tiffany Window image onto a piece of smooth white cardstock using a MISTI and black Memento Ink. I left the stamp in place for later and made a note of the position of my cardstock since I was going to re-stamp the lines for embossing.
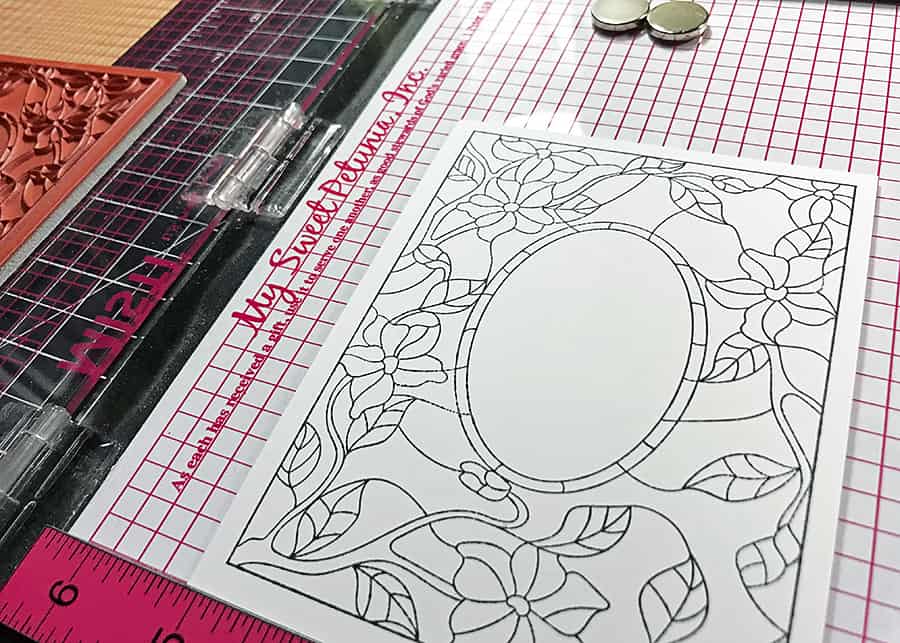
Then, I went ahead and colored everything in (except for the very center oval). The color list is:
- Flowers: YR18, R05 with Y19 centers
- Leaves: Y19, RV69
- Vines: E25
- Background: G20, G21, G43
- Outer Oval: RV69
Embossing and Finishing
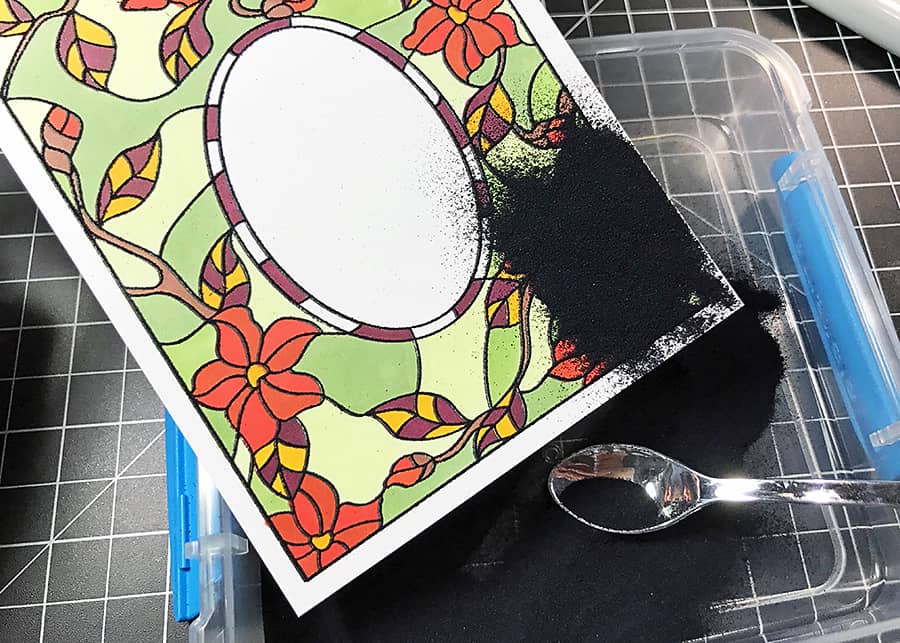
Next, I dusted the cardstock all over with an Anti Static Pouch and re-stamped the lines with Versafine CLAIR in Nocturne. Then, I sprinkled Black Embossing Powder over it, tapped off the excess, and embossed it with a Heat Tool.
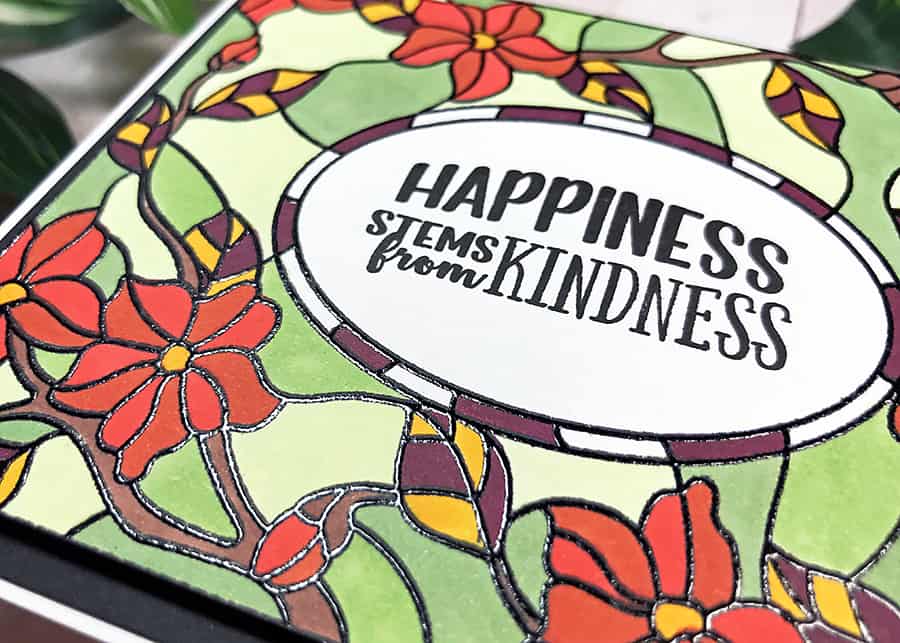
After that, all I had left was to add a sentiment in the center of the oval. I found this really nice one in the Whimsy Stamps Beaucoup Bouquet Sentiments set that was just perfect to go along with the stained glass flower design.
I wasn’t sure of the size at first, though, so I used a little trick to test drive how the words would look: I have a piece of acetate that I use to position and “try on” sentiments before I actually stamp them. It’s saved me from several do-overs in the past!

I liked the placement and how it looked, so I went ahead and finished the stamping portion of the card.
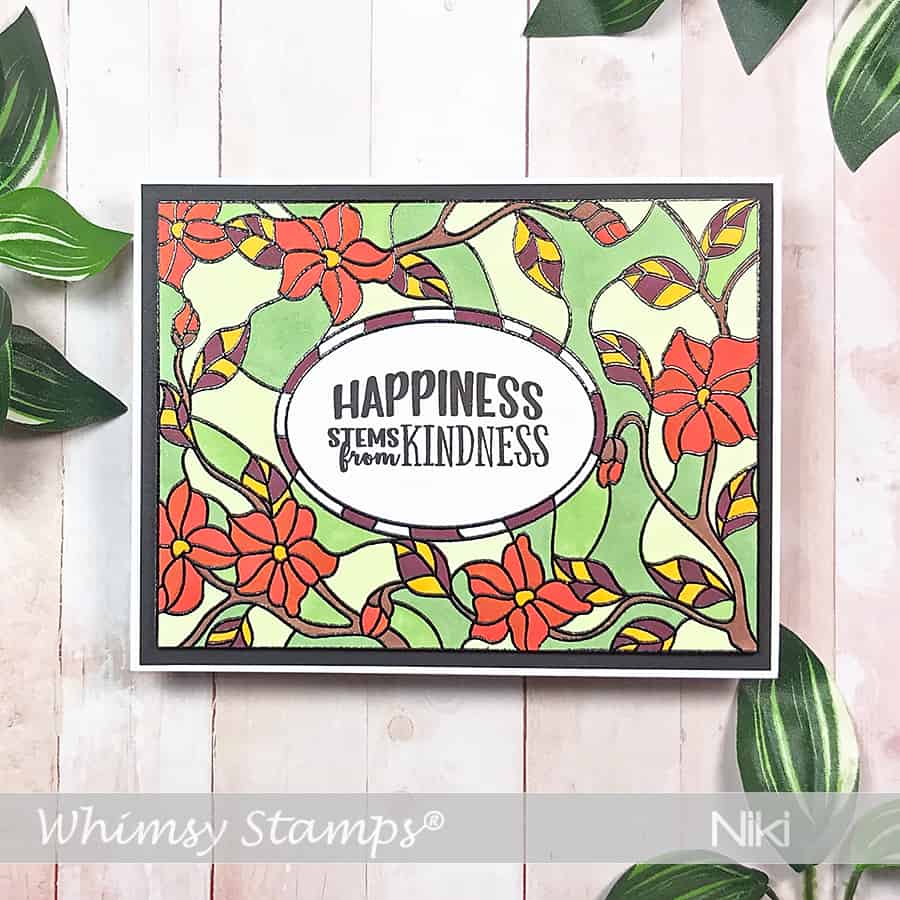
Then it was just a matter of trimming the edges, blackening them with a Copic marker (#100) and adhering the card front to a black cardstock mat with Foam Squares. Finally, I attached the whole thing to a white card base.
Thanks for coming by today to read! I hope you like this card – If you do, please share the love by pinning to Pinterest. Have a great weekend!
PS – Like Copic coloring ideas? Here’s a no-line design you might like!